我们知道 CI/CD 是 devops 中最重要的环节,特别是对于现在的云原生应用,CI/CD 更是不可或缺的部分,对于 CI/CD 工具有很多优秀的开源工具,比如前面我们介绍的Jenkins以及gitlab ci都是非常流行常用的 CI/CD 工具,但是这两个工具整体使用来说有点陈旧和笨重,本文将为大家介绍一个比较热门的轻量级 CI/CD 开源工具:Drone,介绍如何将 Drone 和 Kubernetes 进行结合使用。
本篇文章是 Drone 系列文章中的第一篇文章,需要有一定的 Kubernetes 基础知识,我们将通过 Helm 在 Kubernetes 集群上面安装 Drone,如果你已经有运行在 K8S 集群上面的 Drone 应用,则可以忽略本文内容。
环境
本次 Drone 系列文章使用到的应用相关版本如下:(不保证其他版本一定兼容)
- Drone:1.2
- Kubectl 和 Kubernetes:v1.14.2
- Helm CLI 和 Tiller: v2.14.1
- Docker: 18.09.1
- Golang: 1.11.4
Drone
Drone 是用 Go 语言编写的基于 Docker 构建的开源轻量级 CI/CD 工具,可以通过 SaaS 服务和自托管服务两种方式使用,Drone 使用简单的 YAML 配置文件来定义和执行 Docker 容器中定义的 Pipeline,Drone 由两个部分组成:
- Server端负责身份认证,仓库配置,用户、Secrets 以及 Webhook 相关的配置。
- Agent端用于接受构建的作业和真正用于运行的 Pipeline 工作流。
Server 和 Agent 都是非常轻量级的服务,大概只使用 10~15MB 内存,所以我们也可以很轻松的运行在笔记本、台式机甚至是 Raspberry PI 上面。
要安装 Drone 是非常简单的,官方文档中提供了 Drone 集成 GitHub、GitLab、Gogs 等等的文档,可以直接部署在单节点、多个节点和 Kubernetes 集群当中。
我们这里会使用 Helm 来将 Drone 安装到 Kubernetes 集群当中,如果你对 Kubernetes 还不是很熟悉,可以先去学习下我们的 Kubernetes 进阶课程和对应的视频教程,如果对 Helm 也不是很熟悉的,也可以先去查看下前面的Helm 初体验文章,这里关于 Helm 的安装我们不再细说了。
安装
这里我们使用 Helm Chart 官方仓库中包含的 Chart 包:https://github.com/helm/charts/tree/master/stable/drone,文档中有详细的使用说明。由于 Drone 需要和代码仓库进行连接,如果没有配置,则无法启动,我们这里将结合 GitHub 和 Drone 使用,首先需要先在 GitHub 中注册一个新的 OAuth 应用程序,登录 GitHub,进入页面https://github.com/settings/applications/new,添加如下信息:
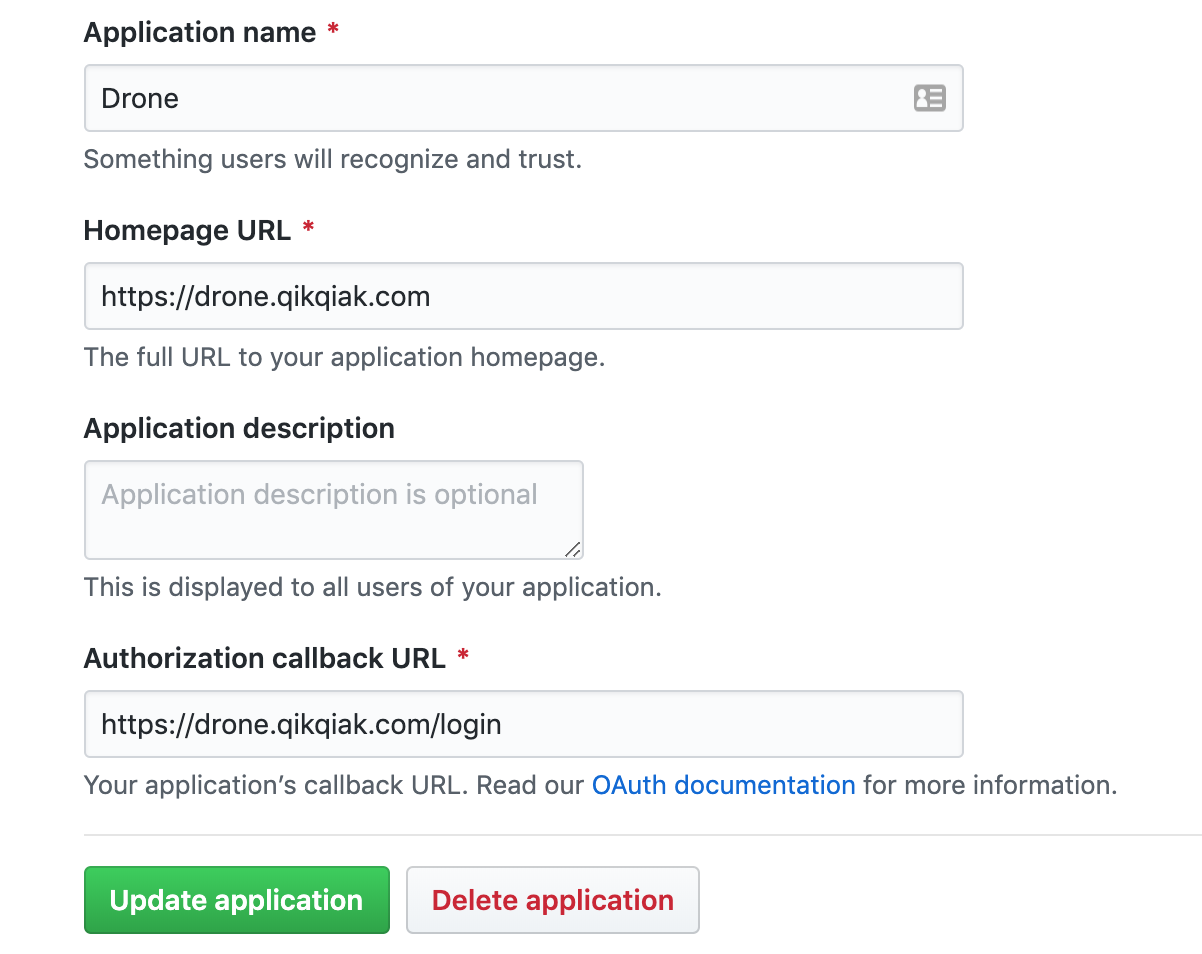
创建完成后会获得用于配置 Drone 的 ClientID 和 ClientSecret,记录这两个值,然后创建一个名为 drone-values.yaml 的文件,通过覆盖 values.yaml 中的 values 值来自定义 Drone,内容如下:
ingress:
  enabled: true
  annotations:
    kubernetes.io/ingress.class: nginx
    kubernetes.io/tls-acme: 'true'
  hosts:
    - drone.qikqiak.com
  tls:
    - secretName: drone-tls
      hosts:
        - drone.qikqiak.com

sourceControl:
  provider: github
  github:
    clientID: 上面获得的ClientID值
    clientSecretKey: clientSecret
    clientSecretValue: 上面获得的ClientSecret值
    server: https://github.com

server:
  adminUser: cnych  # github 的用户名
  ## Configures drone to use kubernetes to run pipelines rather than agents, if enabled
  ## will not deploy any agents.
  kubernetes:
    ## set to true if you want drone to use kubernetes to run pipelines
    enabled: true
  host: drone.qikqiak.com  # 必须加上这个属性,否则github回调地址会是drone的Service地址
  protocol: https

persistence:
  enabled: true
  existingClaim: dronepvc
我们通过 Ingress 对象来暴露 Drone 服务,而且还配置了一个kubernetes.io/tls-acme: 'true'的 annotation,这个是因为我们集群中安装了 Cert-Manager,所以我们可以自动化 https,同样可以参考前面的文章使用 Let’s Encrypt 实现 Kubernetes Ingress 自动化 HTTPS,另外设置server.adminUser我们 GitHub 的用户名,这样我们登录后就具有管理员权限了,另外比较重要的server.kubernetes.enabled=true,将该参数设置为 true,则运行 Drone 的任务的时候就是直接使用 Kubernetes 的 Job 资源对象来执行,而不是 Drone 的 agent,这样设置为 true 后,安装完成后,就没有 drone agent 了,最后通过指定 persistence.existingClaim 指定了一个 PVC 来用于数据持久化,所以在安装之前需要先创建 dronepvc 这个 PVC 对象(volume.yaml):
apiVersion: v1
kind: PersistentVolume
metadata:
  name: dronepv
spec:
  capacity:
    storage: 5Gi
  accessModes:
  - ReadWriteOnce
  persistentVolumeReclaimPolicy: Retain
  nfs:
    server: 10.151.30.11
    path: /data/k8s

---
kind: PersistentVolumeClaim
apiVersion: v1
metadata:
  name: dronepvc
  namespace: kube-ops
spec:
  accessModes:
    - ReadWriteOnce
  resources:
    requests:
      storage: 5Gi
然后通过上面自定义的 values 文件来安装 Drone:
$ kubectl apply -f volume.yaml
$ helm repo update
$ helm install --name drone
     --namespace kube-ops
     -f drone-values.yaml
     stable/drone
Release "drone" has been installed. Happy Helming!
LAST DEPLOYED: Mon Aug  5 23:35:22 2019
NAMESPACE: kube-ops
STATUS: DEPLOYED

RESOURCES:
==> v1/ServiceAccount
NAME                  SECRETS  AGE
drone-drone-pipeline  1        18d
drone-drone           1        18d

==> v1/RoleBinding
NAME         AGE
drone-drone  18d

==> v1beta1/Deployment
NAME                DESIRED  CURRENT  UP-TO-DATE  AVAILABLE  AGE
drone-drone-server  1        1        1           0          18d

==> v1beta1/Ingress
NAME         HOSTS              ADDRESS  PORTS  AGE
drone-drone  drone.qikqiak.com  80, 443  18d

==> v1/Pod(related)
NAME                                READY  STATUS             RESTARTS  AGE
drone-drone-server-6f66b47dc-69qmf  0/1    ContainerCreating  0         0s

==> v1/Secret
NAME                        TYPE    DATA  AGE
drone-drone-source-control  Opaque  1     18d
drone-drone                 Opaque  1     18d

==> v1/ClusterRole
NAME                  AGE
drone-drone-pipeline  18d

==> v1/ClusterRoleBinding
NAME                  AGE
drone-drone-pipeline  18d

==> v1/Role
NAME         AGE
drone-drone  18d

==> v1/Service
NAME         TYPE       CLUSTER-IP     EXTERNAL-IP  PORT(S)  AGE
drone-drone  ClusterIP  10.105.20.182  80/TCP   18d

NOTES:

*********************************************************************************
***        PLEASE BE PATIENT: drone may take a few minutes to install         ***
*********************************************************************************
From outside the cluster, the server URL(s) are:
     http://drone.qikqiak.com
注意我们这里使用的 Drone Chart 版本是
drone-2.0.5,不同的版本配置略有不同,注意查看文档。
安装完成后,可以查看对应的 Pod 状态:
$ kubectl get pods -n kube-ops -l app=drone
NAME                                 READY   STATUS    RESTARTS   AGE
drone-drone-server-6f66b47dc-69qmf   1/1     Running   0          96s
最后需要做的就是给域名 drone.qikqiak.com 添加上 DNS 解析,我们这里是一个正常的域名,直接解析到 nginx-ingress Pod 的任意一个节点即可,如果你是自定义的域名记住在你要访问 drone 的节点上的 /etc/hosts 中添加上域名隐射。
在浏览器中访问 drone.qikqiak.com,正常这个时候就会跳转到 GitHub 进行认证登录,认证后会将 GitHub 的代码仓库同步到 Drone 来,也可以手动同步代码仓库:
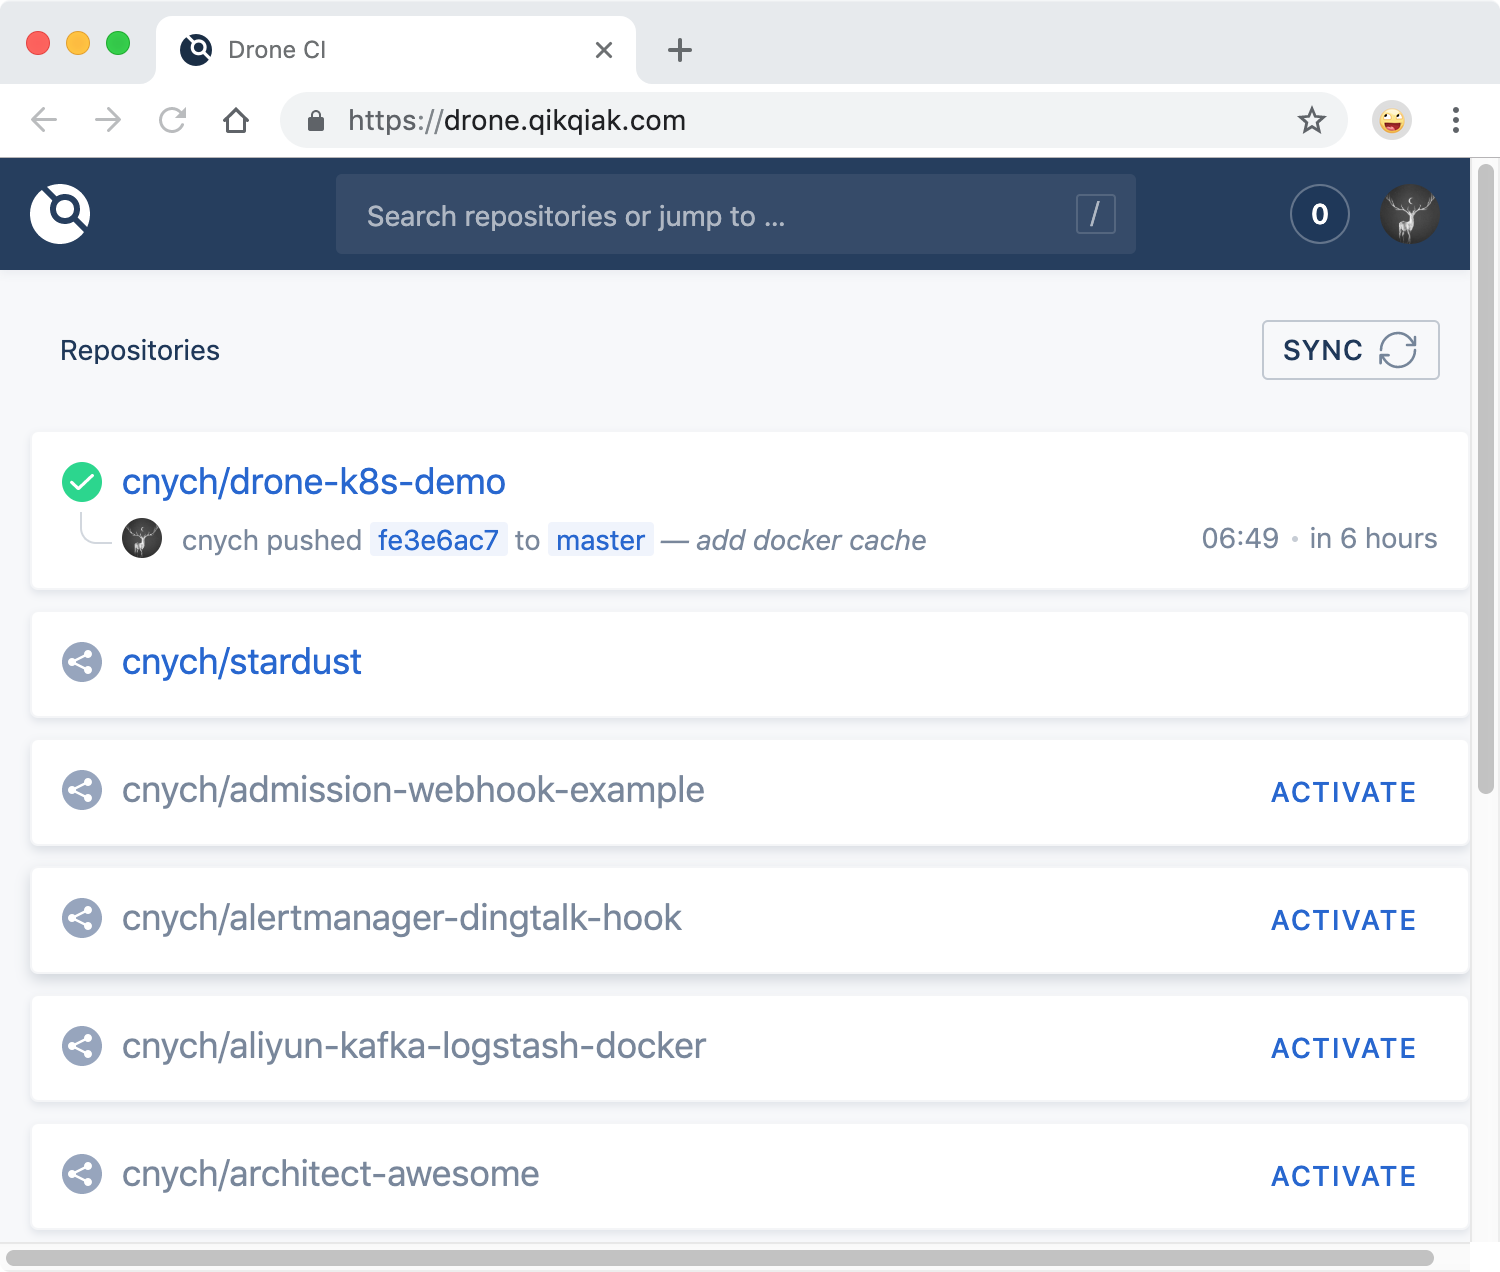
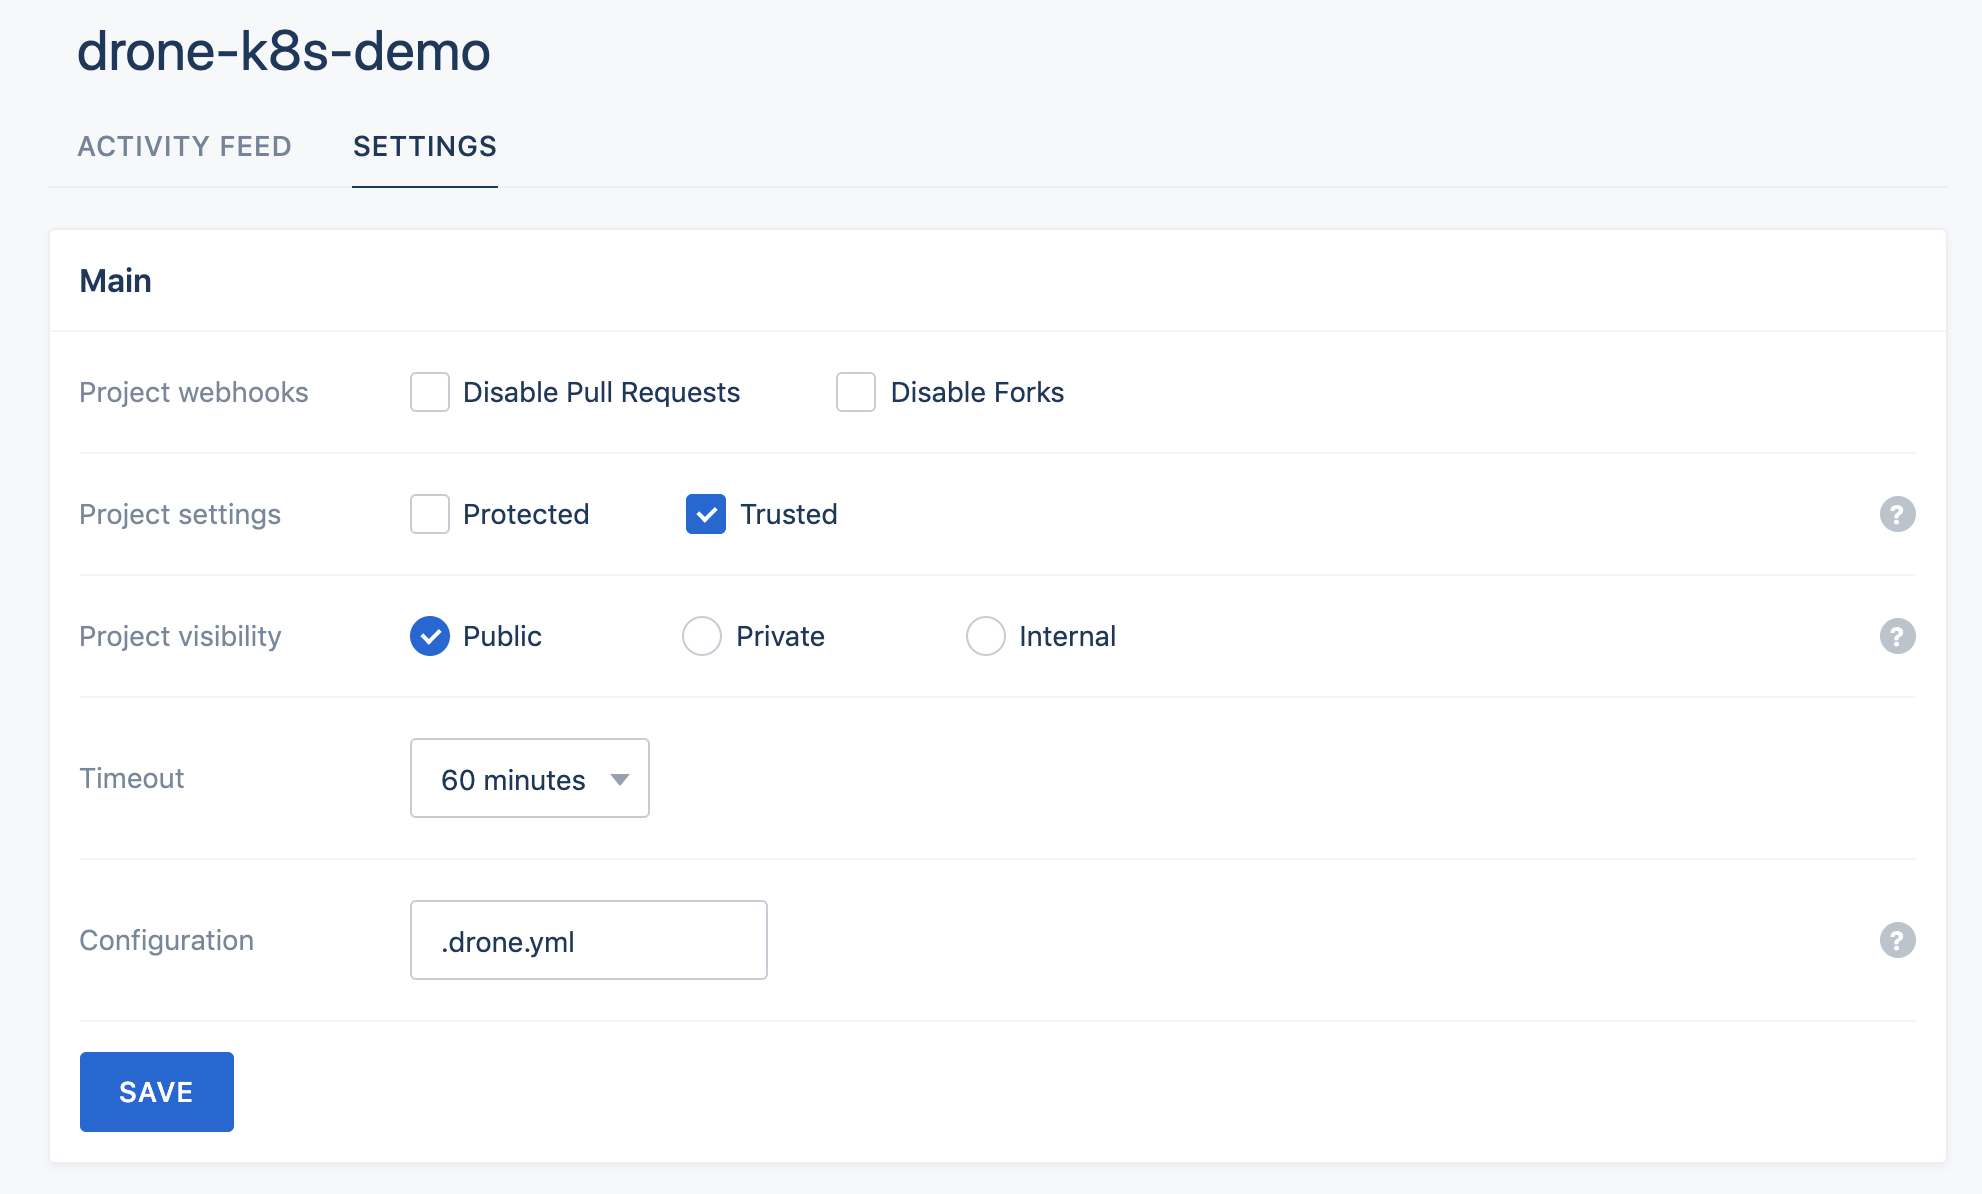
点击项目右边的ACTIVATE激活,进入项目中也可以根据自己的需求进行配置:
到这里我们就通过 Helm 成功安装了 Drone,下一篇文章再和大家探讨如何使用 Drone 的 Pipeline 来进行 CI/CD。
扫描下面的二维码关注我们的微信公众帐号,在微信公众帐号中回复◉加群◉即可加入到我们的 kubernetes 讨论群里面共同学习。


